
How to make the Alice Skirt

Have you been wanting to make a simple yet swirly late 1890s skirt?
This skirt is full of lovely gathers, delicate cartridge pleats, and creates the perfect late-Victorian silhouette. It’s the first (and simplest) piece for The Alice Dress, an 1897 graduation gown originally sewn by my great-great-grandmother and her classmates.
In this tutorial, I’ll guide you through each step, from pattern drafting to hemming. It’s approachable, size-inclusive, and will give you that elegant 1890s swirl.
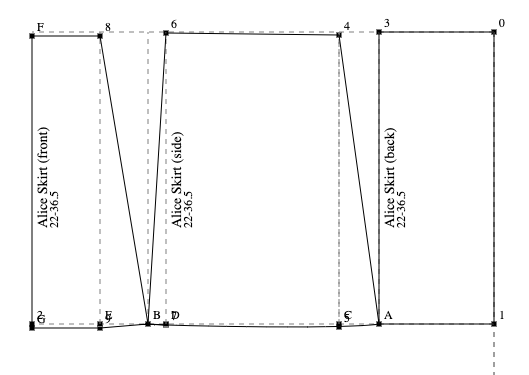
Step 1: Draft Pattern
Follow the link below to find: Alice Dress - Skirt.
Input your waist and skirt length measurements.
I recommend printing out the drafting instructions, instead of printing out and scaling up the image. This is a very large pattern.

Step 2: cut out the pattern
Cut out all the pieces you drafted. Keep the stripes of your fabric vertical. The front and back panels should be on the fold.
In addition, you’ll need three other pieces:
Waist band is 24” on original (22” waist + 1” ease + 1” space for button holes) and 1 5/8” wide. Cut two out of fashion fabric and one out of interfacing. (Add another layer if your fabric is very thin and delicate)
Placket is 16” long and 1 1/4” wide, on a fold (so 2 1/2” wide total). This piece DOES contain 1/4” seam allowance in the width, unlike most of the pieces that do not contain seam allowance. I recommend adding more length than needed, to make sure you’ll have enough if you need to adjust it, or if you’d like the placket to continue into the waistband. The placket will be folded in half, so the closure opening will be about 8” long. Make this longer if you need a larger opening. One half of this will be cartridge pleated into the waist band, so you don’t have to use interfacing here.
Hem support: 8” wide, out of a lightweight but stiff cotton, as long as the hem. (5.2 x waist). This piece helps protect the hem against ripping (if stepped on, for example), helps prevent warping over time, and provides a little extra stiffness to help the skirt fluff out instead of just drop down. In a heavier skirt, you might expect horsehair braid or something along those lines, but with such lightweight dimity, just a layer of cotton will do. Stiffer materials would change the drape of the skirt too much.
The original placket is not sewn into the waistband. However you can sew it in if you want to make sure the top of the placket stays in place. Just make sure you add an extra 1.5” to the length of your waistband.


Step 3: Adding the Placket
Adding the placket:
run a line of stitches about 1/8” on either side of center back (about 7 1/2” long), to stabilize the fabric before splitting it
Line up the middle of the placket with the lowest point of this line, and baste one side in place.
Slice along the line, and finish basting the placket in place.
Stitch the placket in place, on the right side. Make sure you leave one edge open.
Press, then top stitch the placket in place, as close to the edge as possible
Stitch along the waist on the side that is pressed behind the skirt panel.
Pin the placket closed while you follow the next few steps, to prevent warping.


Step 4: Add the Waistband
Sew the skirt panels together, along all of the long sides.
Add the interfacing to the waist band. Stitch 1/8” outside of the seam lines. The original had pretty severe damage on both of the back closure button holes, so I’m adding an extra layer of interfacing to the last 2” on each side.
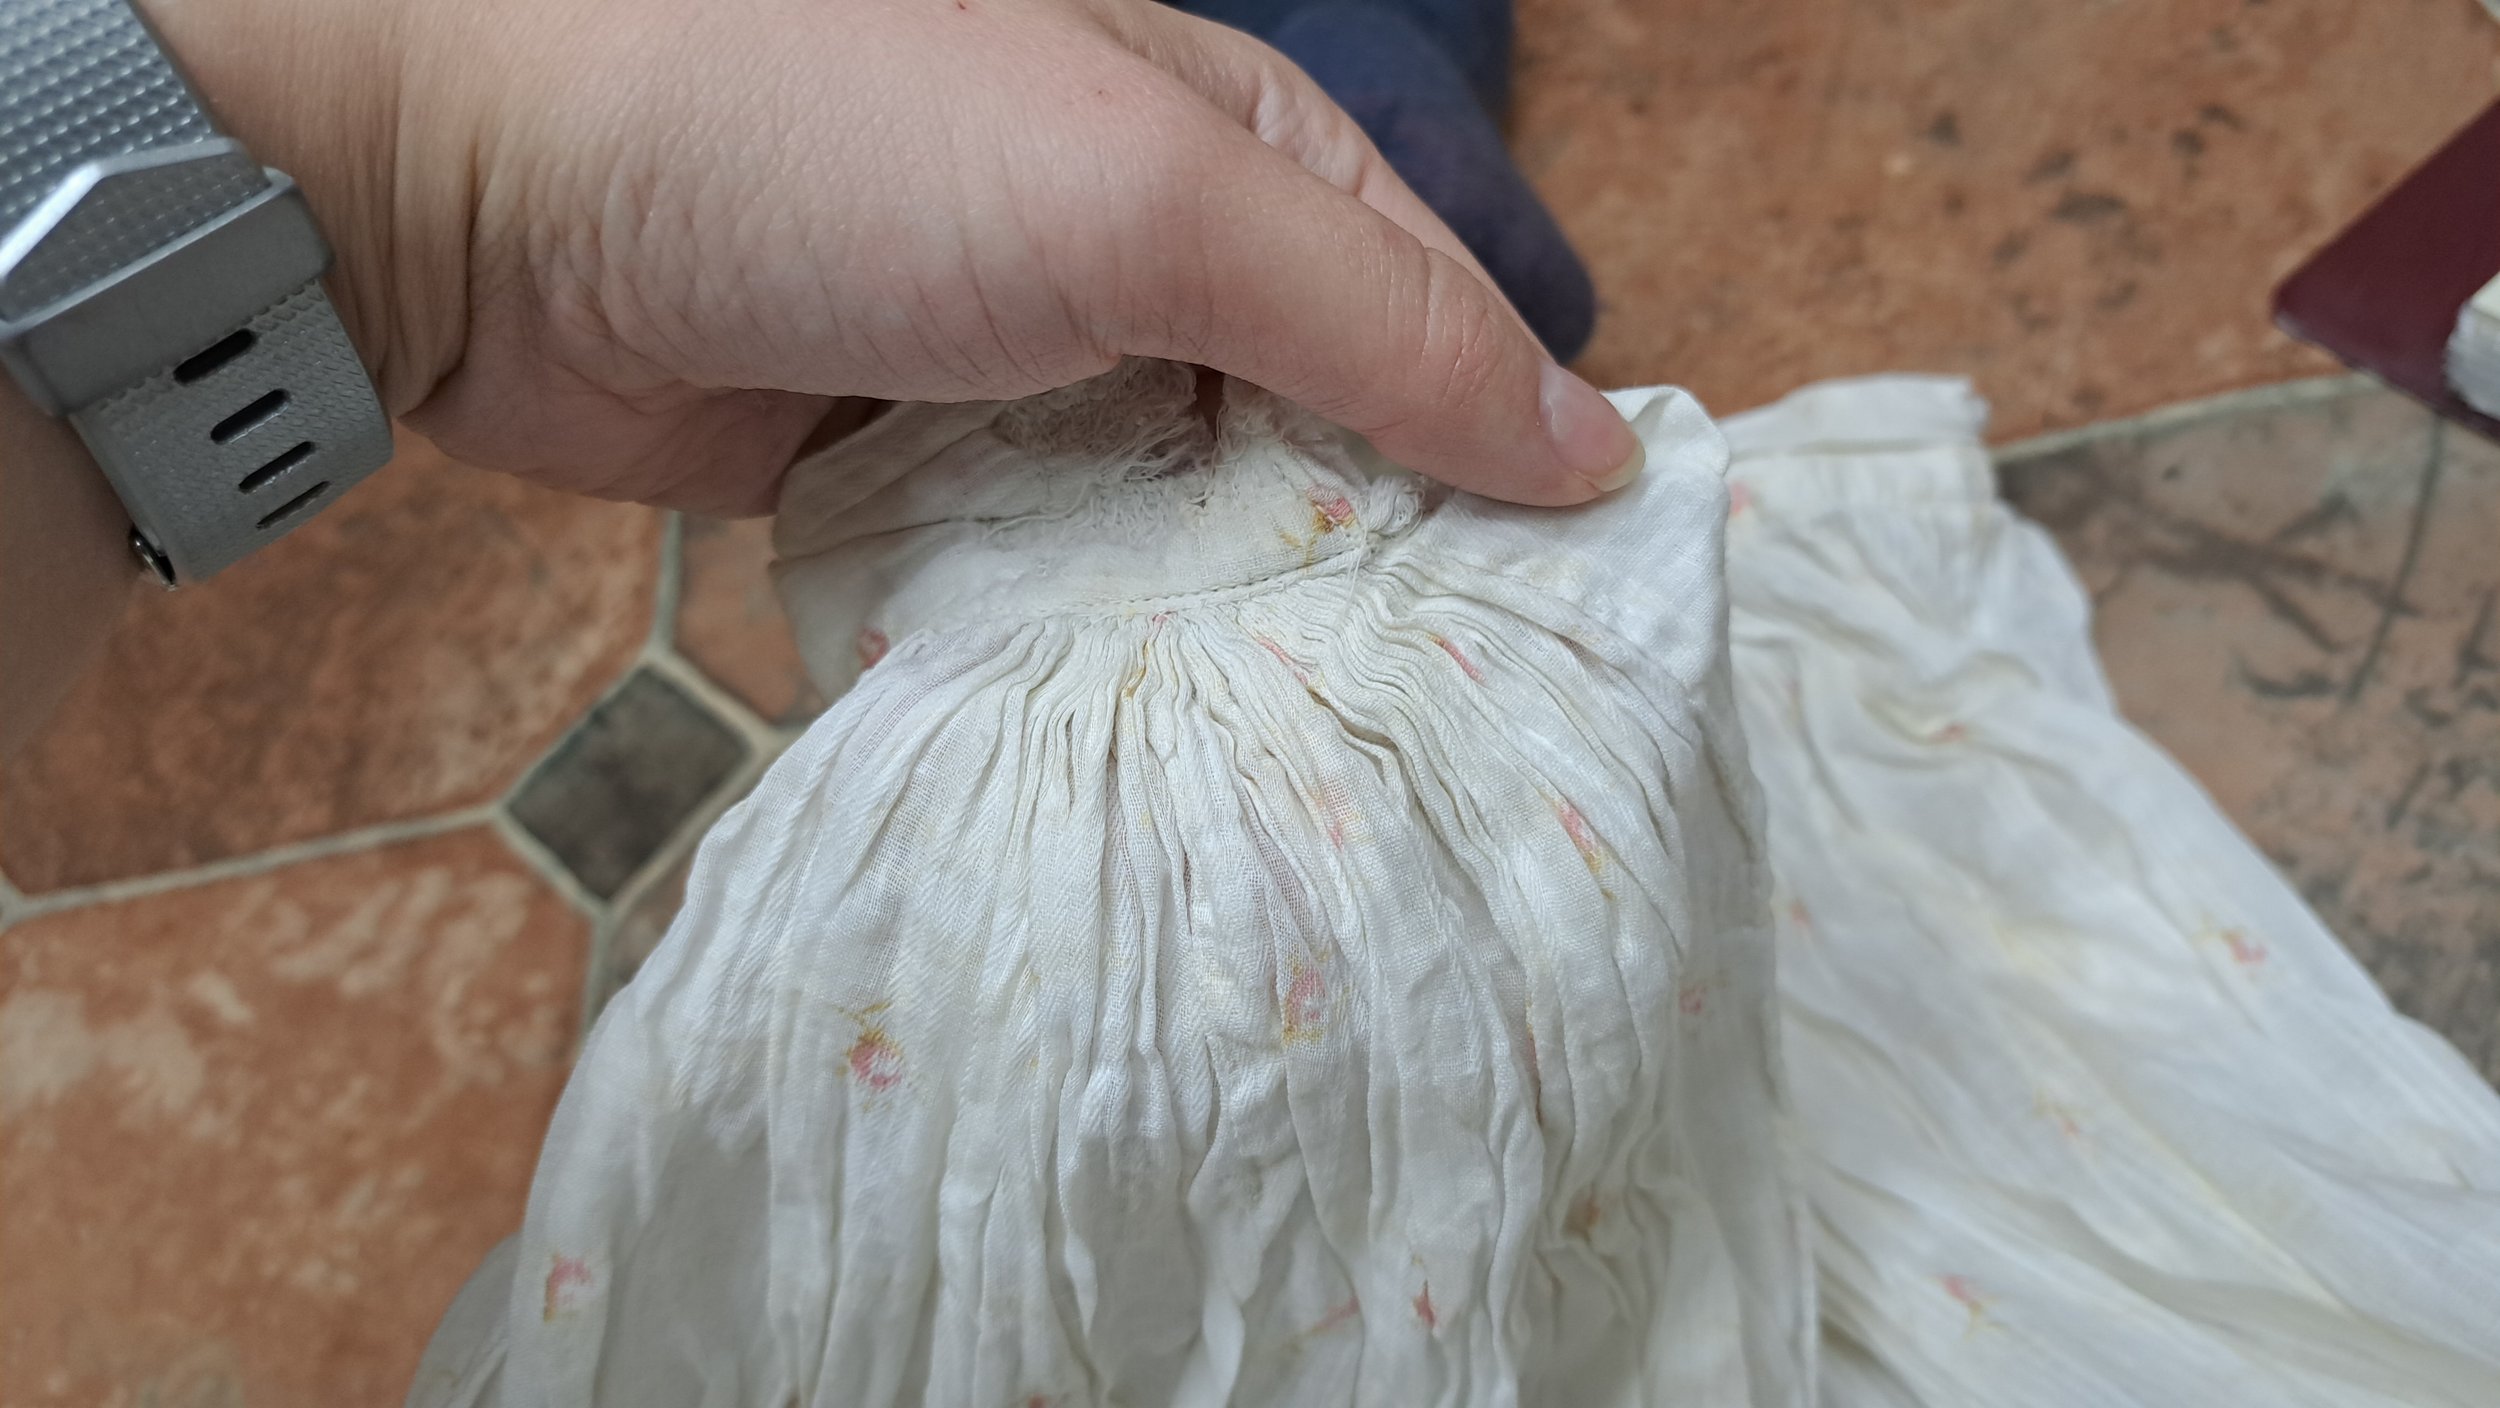
Cartridge pleat the back panels and about 4-6”of the side panels into (waist / 16) on either side of the back opening. Ideally, these pleats should be about 1/4” deep or less.
Gather the rest of the skirt into the waist band. I recommend basting the gathers in place before sewing the waistband down by machine.
Top stitch the waistband on all sides to help flatten the layers. If you have a thicker fabric, I reccomend switching to a heavy duty needle for this part.

Step 5: Add the hem support
For the hem support, fold and press 1/2” along one side. This will be the top of the support panel, set at about 8” up from the hem.
Next, sew the hem support to the bottom of the skirt, right sides together.
Press the seam under, to tuck the edge of the fashion fabric to the inside, in order to prevent the lining fabric from being seen.
Top stitch along the top of the hem support, roughy 8” from the lowest edge of the skirt.
Add closures. I added hook-and-eyes to the very back, since the original skirt only has button holes (as it is designed to only be worn with the bodice, which has the buttons.)

-
As of August 12, I am still working on making this skirt
-
This is a based on a dress made by my great-great-grandmother in 1897, which places it in the very late Victorian period.