
How to make the Alice Bodice

This soft, almost cloudy bodice is the second (and most complex) piece for The Alice Dress, an 1897 graduation gown originally sewn by my great-great-grandmother and her classmates.
In this tutorial, I’ll guide you through each step. This is surprisingly complex, but hopefully I’ll be able to help you through the process!

Step 1: Bodice Pattern Pieces
Have all your 1890s underpinnings ready before making a mock-up: chemise, corset, corset cover, bust improver (optional)
Follow the link below to find: Alice Bodice.
Input your measurements
This and nearly all other patterns on Drafting Dynamically do NOT contain seam allowance. I recommend temporarily leaving 1” as your allowance unless otherwise stated.
I recommend using the Keystone Waist for your mock-ups. The bodice lining and the Keystone Waist are nearly identical.
The lining pieces all should be out of a light but sturdy plain cotton. The front and back yokes and bodice pieces should be out of your outer fabric.
The yokes and outer bodice pieces should be on the fold: Both yoke pieces and the back outer piece are oriented so that if the text is right-side-up, the center is the vertical line. The center line on the outer bodice is at an angle, however when you line it up with your fabric it should be straight up and down.
You can have the back piece of the lining on the fold as well, though it is NOT on the original dress.

Step 2: Sleeve Pattern Pieces
Follow the link below to find: Alice Sleeve
Input your measurements
Add seam allowance. All three parts will be made out of the outer fabric. The slim sleeve pieces should also be cut out of the lining fabric.
There is no lining or support for the sleeve puff. Cut the puff on the fold on the large vertical line.

Step 3: Collar Pattern Pieces
Follow the link below to find: Alice Collar
Input your measurements
Now we start the pattern modifications.
There are several pieces of this bodice that either have patterns that need to be altered, or they are made from other pieces.
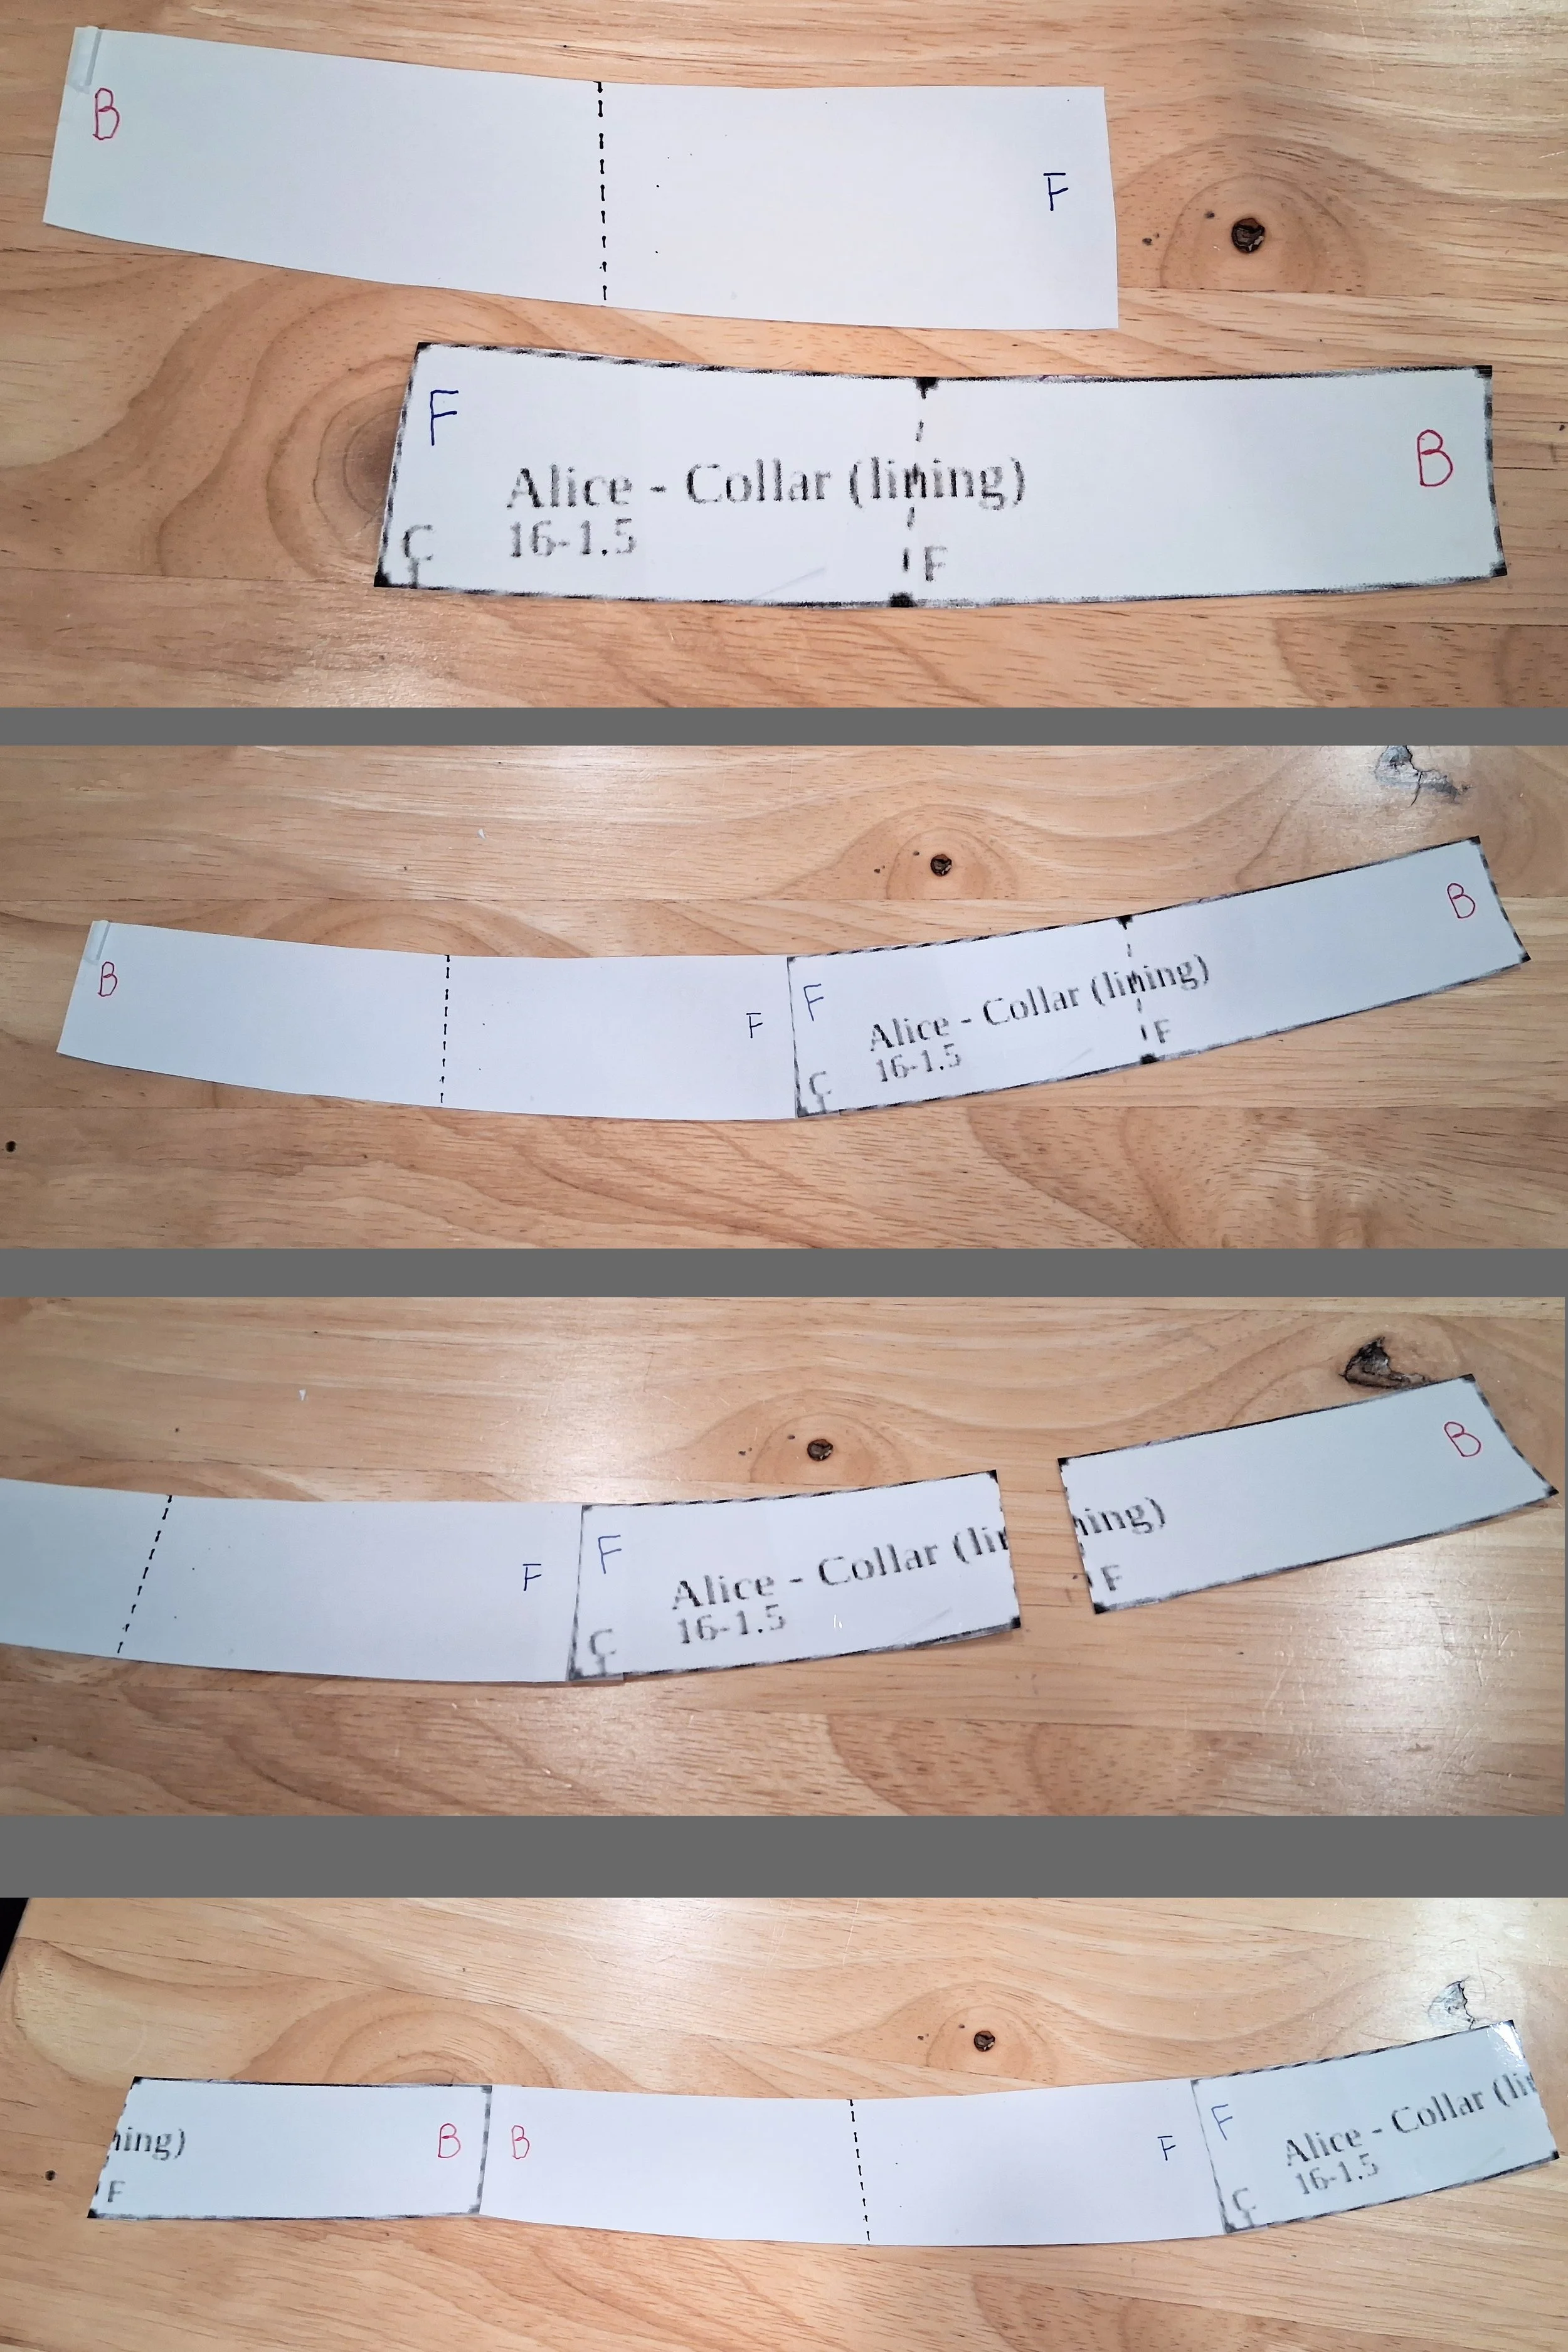
The Collar (lining) piece needs to be altered slightly.
D to F is the center front, while the shorter B to A is center back.
However, the bodice opens on the left shoulder.
First, make a mirror copy of the collar lining, tape them together at center front.
Cut the original at the dotted line E-F.
Line them up center back
If needed, you can slightly smooth the curves at the connections.
Both the lining and outer collar pieces are cut out of the outer fabric. Cut out the lining with interfacing as well.

-
As of August 12, I am still working on making this skirt
-
This is a based on a dress made by my great-great-grandmother in 1897, which places it in the very late Victorian period.